

Trail cameras are a great way to keep an eye on your property. Even if you are not a hunter you can use them to monitor wildlife or for security purposes. However, if you have a large property or multiple trail cameras, it can be hard to keep track of them all. Finding lost cameras can be difficult because modern trail cameras are compact and hard to see.
So, what do you do if you forgot where you placed them or if you suspect someone may have trespassed on your property and placed trail cameras there?
How do you discover trail cameras on your land? Here are some tips to help you find trail cameras on your property.
Table of Contents
Places to Look for Trail Cameras on Your Property
If trail cameras are being used for security purposes at your home, business, or cabin it is usually pretty obvious where you should look when trying to find them. You will probably want to look on trees, posts, or under eaves where there is a view of the areas or things you are trying to watch.
Conversely, if you are trying to find trail cameras that were put out to monitor deer or other game animals on hunting or farmland, it can feel like you’re looking for a needle in a haystack. But if you know where to look, it’s a lot easier to find these cameras.
So here are some places to look out for when looking for trail cameras.
Trees and Posts (Yes, This One Is Pretty Obvious.)
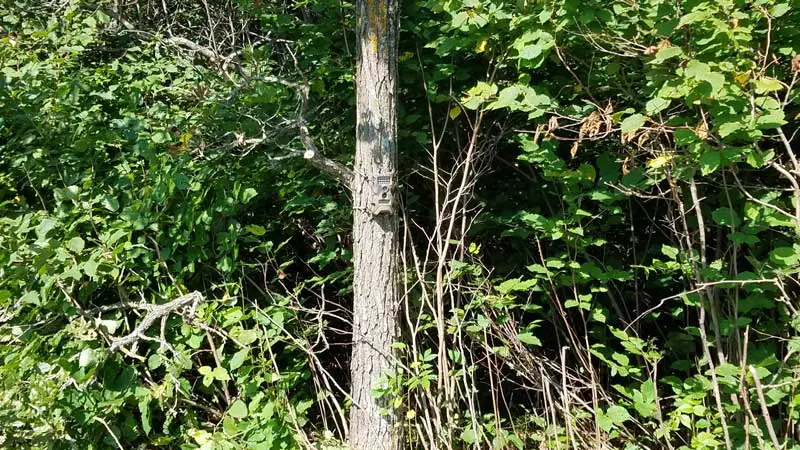
Trail cameras are typically mounted on posts or trees. However, if there are no posts or trees nearby, people might use man-made trail camera posts that can easily be stuck in the ground. So regardless of the location, you want to look for trees and posts that have a good view of the spots where game animals are likely to frequent.
While looking on trees for trail cameras is important when looking for trail cameras, there are a ton of trees in the woods. So let’s keep moving on and narrow things down a bit more by talking about some of the places or signs you should be focusing on.
Game Trails
If you’re looking for a trail camera, your best bet is to look for game trails. These are paths that animals regularly use to travel from one place to another. By following a game trail, you will often come across a trail camera that’s been set up to capture footage of the animals that use the trail.
Food Plots, Feeders, or Bait Piles
One of the best ways to find trail cameras is to look for areas where there is food. This can include food plots, feeders, or bait piles. By looking in these areas, you will be more likely to find a trail camera that has been placed there by someone who is trying to attract deer or other wildlife.
Signs of Deer Activity Like Tracks, Rubs, or Scrapes
If you’re looking for a trail camera, one of the best places to start is by looking for signs of deer activity. Tracks, rubs, and scrapes can all be good indicators of deer activity and if other hunters have also seen this activity they could very well have posted a trail nearby to monitor the animals that are passing through the area.
Naturally Occurring Food Sources
An important factor to consider is food sources. Animals are more likely to congregate in areas where there is food, so look for grassy areas, farm fields, or trees that bear fruits or nuts. Oak trees, for example, produce acorns, which are a favorite food of many animals. Once you’ve identified potential food sources, it makes it easier to start looking for trail cameras.
Naturally Occurring Water Sources
One of the best ways to find trail cameras is to look by naturally occurring water sources. These can be ponds, streams, or other bodies of water. Oftentimes, people will place trail cameras near these water sources in order to get the best possible view of wildlife in the area. By looking for, and by, these water sources, you can increase your chances of finding a trail camera that has been placed on your property.
Tree Stands or Ground Blinds
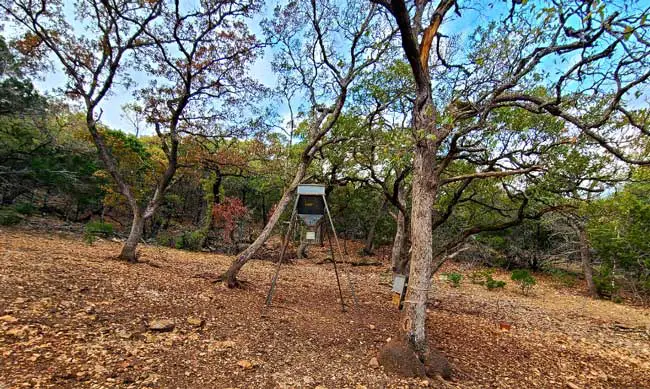
Tree stands are hunting platforms that are elevated off the ground and affixed to a tree and is used by hunters to get a better view of their surroundings and to improve their chances of spotting and shooting game.
Ground blinds, which are temporary structures made from natural materials or camouflaged fabric, are placed on the ground and used by hunters to conceal themselves from game animals.
When looking for a trail camera, try to find areas where tree stands or ground blinds are located, have been in the past, or are likely to be in the upcoming hunting season. Often located near game trails, deer stands or ground blinds are a good place to start your search.
North Side of Trees
A false trigger is when the trail camera’s motion sensor, otherwise known as its passive infrared sensor (PIR), is triggered by something other than the intended target, such as wind blowing branches, tall grass moving in the breeze, or even falling leaves. Another thing that can cause false triggers is the sun. If the sun shines directly on the PIR sensor or reflects off of something, it can cause the camera to trigger.
Most people who have used trail cameras for a while have experienced false triggers. To help eliminate false triggers, they have learned to face the camera north so that the sun is behind the camera and never in front of it.
So if you find a spot that looks like it might be a good place to put a trail camera, start by looking on the north side of trees that face the location. If there’s an option to put the camera on the north side of trees that face the location, that’s probably where they will be.
At Least 3 Feet off the Ground
Assuming that the trail camera is being used to monitor deer or similar-sized animals you will want to look for cameras at least 3 feet off the ground. Approximately 3 feet off the ground is the approximate height that myself and most deer hunters will place their trail cameras.
The reason for this is that positioning cameras at least 3 feet off the ground not only is a perfect height to monitor deer, but it helps avoid false triggers from tall grass and brush moving in the wind. Additionally, it will help to prevent the camera from capturing pictures and videos of smaller animals that you aren’t interested in that might pass near the camera.
Elevated Positions
")
When you are looking for a trail camera, don’t just focus on the ground 3 feet in front of you. Look for cameras in elevated positions too. Sometimes people will place cameras higher up and angle them down at the area they want to monitor. This helps keep the camera out of the line of sight and prevents trespassers or thieves from seeing the camera. It also helps avoid spooking deer and other wildlife.
What to Look For During the Day
Depending on when you’re looking for trail cameras, the things that will give away their location will be different. We will begin with the things you should pay attention to during the day since that is when most people will be looking for them.
Rectangular or Square Shapes
When trying to find a trail camera, be alert for rectangular or square shapes. Right angles don’t naturally occur in nature very often, so seeing something that has a right angle is likely to be man-made and could be a trail camera and is probably worth checking out.
Inconsistencies in the Color of Tree Bark
As we discussed earlier, the majority of trail cameras are placed on trees. However, despite coming in a variety of colors or having camo exteriors, it is hard to find a trail camera that blends well into the tree it is on. Very often, the color or pattern on the exterior of the camera is very different than the tree bark.
What often happens is that the hunter or land owner usually buys the trail camera before they know the exact location they want or need to monitor. Then when they find the spot they want to keep an eye on the camera’s exterior doesn’t match the trees in the area.
So looking for color inconsistencies in the color of trees or tree bark can be a great way to discover a hidden camera.
Trail Camera Mounting Strap

When looking for a trail camera, it is important to remember that the trail camera itself is not the only thing that can give away its location. Most cameras are held into place with a mounting strap, and these straps are often khaki, green, or black in color. They often don’t match the tree or post they are wrapped around, so looking for horizontal bands around or across trees or posts is another good strategy.
In addition, the straps can sometimes be much longer than the tree or post they are wrapped around, and the excess strap can come loose and hang down, moving in the wind. So be sure to check for that as well.
Reflections
If the sun is shining when you are trying to find a trail camera, look for reflections from the camera lens or any other reflective surfaces on the camera. The majority of a trail camera’s exterior has a flat (not shiny) finish, so it may not be very likely that you will see a reflection from the camera, but reflections aren’t too common in the woods, so take a closer look if you happen to see one.
What to Look For at Night
If you’re looking for a trail camera at night, it will be more difficult, but not impossible. However, the strategies and things you need to look for will be different than during the day. So here are some tips on how to find trail cameras on your property at night.
A White Flash
If you’re trying to find a trail camera at night, look for a white flash. Several years ago having a white flash was fairly common. These days most trail cameras aren’t equipped with a white flash to illuminate their subjects at night, but those that do have a white flash will emit a bright flash (like in normal flash photography).
Most people who use trail cameras want to avoid spooking wildlife or giving away the location of their camera, which is why white flash is not very common. However, some people don’t mind spooking animals or giving away the location of their camera in exchange for color images.
The Red Glow From Cameras With Low Glow IR Flash
Almost all modern trail cameras have an infrared flash, and the majority of those cameras have a low-glow IR flash. This means that when the flash is on, the front of the trail camera will glow red, even though the naked eye won’t be able to see the area that is being illuminated. This can be tricky, as the glow is often very faint and might only last for a moment if the camera is set to take pictures instead of recording videos.
So, if you’re trying to find a trail camera on your property, keep an eye out for the red glow in low light conditions.
When Searching for a Trail Camera at Night Using a Flashlight Look for Reflections
When you’re looking for a trail camera on your property at night you are probably using a flashlight. If so, you should be on the lookout for reflections from the camera’s lens or any other reflective surfaces on the camera. Take a moment and get a closer look if you see a reflection and make sure it isn’t a trail camera. This is especially true if you are searching in the woods where reflective items are uncommon.
Look for Things That Require the Use of Specialty Tools or Apps
Even if you’re looking in all the right places, it can be tough to spot trail cameras with the naked eye. But thankfully, you can use technology to help give yourself the upper hand.
Available Bluetooth Devices That Are Nearby
If you think there is a trail camera on your property but can’t seem to find it, one tactic you can try is using your smartphone or another device to scan for available Bluetooth devices nearby. Some trail cameras are equipped with Bluetooth allowing you to connect to them wirelessly from a short distance away, but their Bluetooth signal allows for them to be more easily located and identified. The Bluetooth is usually always on, so you can try using your smartphone to search for nearby Bluetooth devices.
Simply open your Bluetooth settings on your phone and look for any devices that are within range. If you find an available device, you know that something is in the area. And if you are in the woods, odds are it is a trail camera.
This is a tactic you can try using to confirm the presence of a trail camera when you are in a location where you believe there is a trail camera but can’t seem to find it. Remember, this will only work for trail cameras that have Bluetooth, which is becoming increasingly common. So it may be worth a shot, especially if you know roughly where it’s supposed to be.
Available WIFI Devices That Are Nearby
These days an increasing number of trail cameras allow you to connect to them wirelessly using WiFi and/or Bluetooth. We just discussed using your smartphone to scan for available Bluetooth devices and that would honestly be the place I would start if I were using my smartphone to scan for wireless (not cellular) trail cameras.
However, if you can’t find the camera when scanning for Bluetooth devices, but you feel certain that a wireless trail camera is nearby you might try using your smartphone to scan for available WiFi signals. WiFi has a greater range than Bluetooth so you won’t need to be as close to discover a WiFi device.
Most wireless trail cameras are equipped with WiFi, but the WiFi is usually turned off most of the time making this tactic more of a long shot. To use the WiFi, you typically need to turn it on using Bluetooth. So while it’s less common to find a trail camera by looking for available WiFi signals, it could still be worth trying when you’re trying to find a trail camera on your property.
Use Your Smartphone’s Camera to Look for Cameras With No Glow & Low Glow IR Flash
My favorite type of flash for a trail camera is the no glow IR flash. As we discussed earlier, most trail cameras have IR flash. While the low glow version of this IR flash causes the front of the camera to glow red, the no glow IR flash (also called “black flash” or “invisible flash” by some manufacturers) doesn’t cause the front of the camera to glow and is undetectable to the naked eye making this type of flash more popular among people who don’t want their cameras flash spooking animals or giving away the camera’s location at night.
Since the flash on these “no glow” cameras doesn’t emit any light that you can see with your naked eye, a great way to find them at night is to use a camera that can detect IR light. Luckily the camera on most smartphones can see the light from the IR flash on both no glow and low glow cameras. If you’re trying to find a no glow camera on your property at night, the great way to do it is to use your smartphone’s camera to scan the area. By using your smartphone camera you will be able to spot cameras with IR flash even in the darkest of night.
In our article where we answered the question of can trail cameras work through glass, we took some images at night and you can see below the amount of IR light we were able to detect at night through high-efficiency windows.

The above image shows IR flash captured inside the house at night.
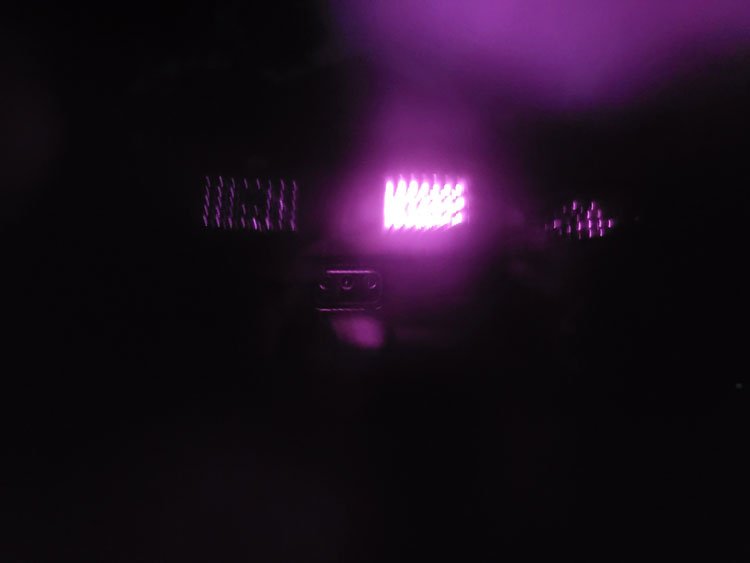
The above image shows IR flash from 3 cameras through a window (you can see the reflection of my phone in the image).
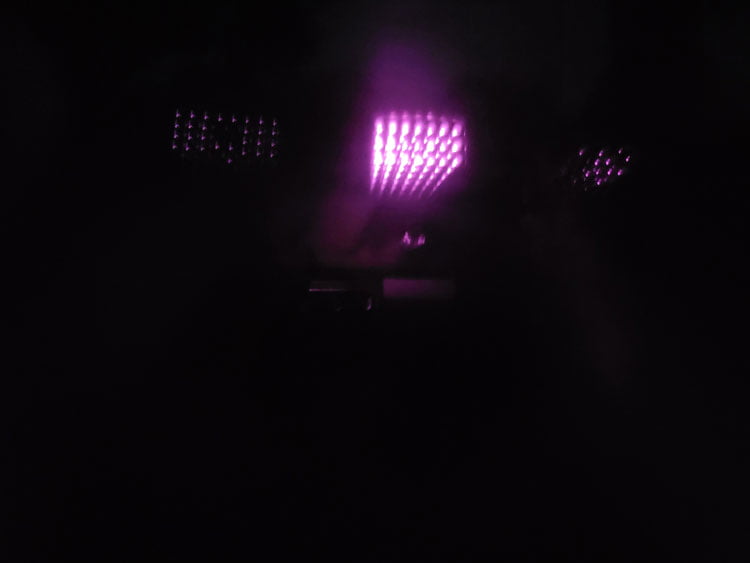
The above image also shows IR flash of 3 cameras lined up inside in front of a window (captured from outside).
Hopefully, these images will give you an idea of what to look for when using your smartphone’s camera at night. night.
When Trying to Find a Cellular Trail Camera Check Its GPS Location Information
If you have a cellular trail camera, one of the best ways to find it if it’s lost or stolen is to check the GPS location information on the camera’s smartphone app. Not all cellular trail cameras have this GPS feature, but if yours does, it can be a big help in locating your camera.
Use a Mapping App
The best way to find your trail cameras is to never forget where they were placed, to begin with.
When I place my trail cameras in the woods, I use a mapping app like onX to make a waypoint of where each camera is placed. Then, when trying to find a trail camera, simply search for the waypoints you created using when you initially placed it on your property.
With onX, or a similar app, you can also create waypoints for other features on your property, such as hunting blinds, tree stands, or ATV trails. This can help you keep track of all your property’s features and make it easier to find your way around.
It can’t begin to tell you how useful this tip is for keeping track of your trail cameras, especially if you use multiple trail cameras and sometimes move them around to scout different parts of your property.
Final Thoughts
If you have a large property or multiple trail cameras, it can be hard to keep track of them all. By following the tips we shared, you can help ensure that you are aware of where all the trail cameras are on your property, whether you’ve lost track of your trail cameras, or you suspect someone has placed them on your property without your permission.
