
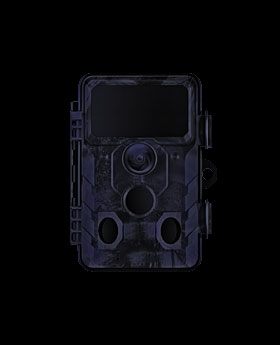

Trail cameras are a popular way to scout deer or other game animals as well as a great way to monitor your home or business. Part of the popularity of trail cameras is their ability to capture pictures and videos during both the day and night. However, sometimes the camera does not function properly and only produces black images at night. A malfunctioning trail camera can be frustrating to deal with, but a quick analysis of what is going wrong will help you diagnose and fix the problem. In this article, we will explain what might be causing your trail camera to take black pictures at night and show you what you can do to fix it.
Table of Contents
Check The Batteries
The first and easiest thing you should do if your camera is experiencing this problem is to check the batteries. Since you are getting pictures from the camera at night, albeit black pictures, many people assume that the batteries are just fine otherwise the camera would not operate at all.
As it relates to the batteries there are two things we need to think about voltage and type.
Battery Voltage
Almost every trail camera these days use AA batteries. These batteries ideally should provide about 1.5 volts per cell. However, in real-world use, the actual voltage each cell provides can be lower and if the voltage in each cell drops to around 1.2 volts you can almost certainly expect that your camera will be having problems. This is important because each trail camera is designed to operate on a specific voltage and if the voltage of the batteries in the camera falls below that threshold one of two things will happen.
Many cameras will simply turn themselves off and stop working entirely if the battery voltage isn’t at the recommended level.
Other cameras will continue to operate at lower voltages. However, some features will perform poorly and others, like the flash, eventually may not work at all if the voltage gets low enough. That said, if your trail camera is taking a bunch of black pictures at night but otherwise operating as normal, there is a good chance the problem is low voltage.
It is also worth noting that each brand and model can vary in the recommended battery voltage.
So if your camera is taking black pictures at night or is experiencing other performance issues it is a good idea to make sure the batteries are giving the camera the power it needs.
To find out the exact voltage you are getting from your batteries you can use a multimeter to do a simple test to see what voltage each battery is providing. Below is a YouTube video that shows exactly how to use a voltmeter to test the voltage of a AA battery.
Multimeters, which are also called voltmeters or multi testers, are very affordable and have a ton of uses for all sorts of do-it-yourselfers. If you need a multimeter here is a very affordable option from Amazon.
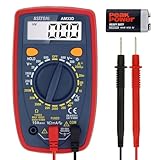
- Additional Tips - The following incorrect operations may cause the multimeter not to show results: Firstly, the plugs of test leads are not fully inserted or not inserted into the correct sockets. Secondly, the manual rotary switch is not placed in the correct position. In addition, this meter can not test all AC Current and below 100mV AC Voltage. Please check the user manual carefully before measurement.
- Versatile Digital Multimeter - Accurately measures AC/DC Voltage, DC Current, Resistance, and Diode. This Multimeter is a really useful tool for solving industrial and household electrical issues. Suitable for Household Outlets, Fuses, Batteries (including Vehicles), Automotive Circuit Troubleshooting, Charging Systems, Testing electronics in Cars etc.
- Troubleshooting with Accuracy - This Multimeter has a sampling speed of 2 times per second; Built-in a backlight LCD display with 3 ½ digits (1999 count) 0.6”, and high polarity including negative and positive readings.
- Ensures Safety - Double fuse is anti-burn and protects from overloading. The silicone cover can protect the multimeter from failing damage and prevent electric shocks. And low battery indication will be displayed when battery power is low.
- Ease of Use - Support Data Hold, Auto Shutoff and Continuity Buzzer. Includes Convenient feature like LCD Backlit Screen makes it easy to use in dimly light areas. Batteries/Set of Test Leads/User Manual are Included.
If you don’t have a battery tester and don’t want to buy one or make a special trip to the store to pick one up you can always try putting a full set of new batteries in your camera if you have some on hand. The odds are pretty low that there will be a bad battery if you are using quality batteries right out of the package. Putting in a set of new batteries actually leads us to the next reason why your camera might be taking black pictures at night… The type of batteries you are using.
Battery Type
Even if you put in new batteries, the type of batteries you put in your trail camera will affect the camera’s performance. There are 3 different types of batteries that people put into trail cameras, but each type can give you drastically different results.
Lithium batteries will often start out at 1.6 volts and will maintain a voltage output of between 1.5 and 1.4 volts throughout almost the entire life of the battery (even in cold weather). Due to the consistent voltage they provide, trail cameras are able to receive the voltage they were designed for when using lithium batteries, which results in consistent high-level camera performance.
Alkaline batteries usually start out at 1.5 volts when you take them out of the package, their voltage begins to drop as soon as you put them in the camera. This means that the voltage the camera is receiving could be quite low even though the battery should have a lot of its expected life remaining. So if you are having problems and are using alkaline batteries you might want to try testing their voltage as we discussed earlier or try putting in a new set of alkaline or lithium batteries and see if that solves your problem.
The last type of battery is rechargeable, which these days are usually powered by Nickel Metal Hydride (NiMH). Using rechargeable batteries in trail cameras might not be the best idea and in fact, many trail camera manufacturers such as Browning, Stealth Cam, and Bushnell go so far as to say that that you shouldn’t use rechargeable batteries in their cameras. The reason for this is due to their low voltage output. Soon after you begin using them most rechargeable batteries quickly drop to about 1.2 volts, which for many cameras as we discussed earlier can result in poor performance or the camera shutting itself off altogether. While there are some trail cameras out there that support using rechargeable batteries, those cameras are typically operating at a lower level of performance. So if you are using rechargeable batteries in your trail camera you should first check the user manual to see what the manufacture has to say about using them in the camera. Otherwise, you could try swapping them out for a fresh set of new lithium or alkaline batteries and see if that solves your problem.
What Type of Flash Does Your Trail Camera Have?
While certain manufacturers might come up with their own names for the type of flash that is on their trail cameras, there are 3 different flash options that can come on trail cameras.
- White Flash – It gives a burst of white light to allow the camera to take color pictures at night. This type of flash used to be the standard, but very few trail cameras have white flash anymore.
- Low Glow (IR) Flash – A type of Infrared flash that is barely detectable by humans and animals. Most people or animals won’t notice when the flash is in use unless they are looking at the front of the camera, which will glow red when the camera is taking pictures.
- No Glow (IR) Flash – A type of infrared flash that humans and animals can’t detect when it is in use even if they are looking at the camera when it is in use.
Checking for Flash Problems with Cameras With White Flash
If you have a camera with white flash it is pretty easy to test to see if the flash is working. Set your camera up outside at night (or in a dark room) and pass within its detection range. It will be pretty obvious if the flash went off. If the flash didn’t turn on, but the camera took a picture it is pretty obvious that the detection circuit is working and that there is something the matter with the flash itself or something that is preventing the flash from working.
Checking for Flash Problems with Cameras With Low Glow Flash
You can do the same thing to test a low glow camera as you would to test a camera with white flash. Wait until it is dark outside or put the camera in a room that is completely dark and when you pass close by the camera you will be able to see the IR LEDs glow on the front of the camera when the flash is in use.
Checking for Flash Problems with Cameras With No Glow Flash
Since it isn’t detectable by the human eye it is a little more complicated to determine if the flash on a camera with no glow flash is working. However, what you can do is use a smartphone, video recorder, or another camera that can “see” infrared light. When you walk in the trail camera’s detection range in the dark while using a smartphone camera or other device that can see IR light you will be able to determine if the no glow flash went off.
If you know that you are using a good set of batteries and the camera is working fine during the day, but the flash isn’t being activated at night and you keep getting black pictures at night you could very well have a problem with the flash and it might be time to reach out to the trail camera manufacturer especially if the camera is still under warranty.
Problems With The IR LED Flash Emitters
If your trail camera is using infrared flash you should know that infrared LED flash emitters are designed to be pretty durable and usually last a very long time. The rate of failure is extremely low, so it’s unusual to have a problem with one.
So it is more likely that your camera’s problem of taking black pictures at night has to do with issues related to its batteries, or its IR filter.
Problems With the IR Filter
Sometimes the batteries are just fine and you still struggle with the camera taking black pictures at night. If this describes your situation and your camera doesn’t have a white flash the next thing we want to think about is a possible problem with the camera’s IR filter.
What Is the IR Filter and What Does It Do?
To capture an image in low light settings the infrared flash works by sending out a steady burst of infrared light. This burst of infrared light being sent out by the camera gets reflected back by the subject being photographed. The IR filter on a trail camera equipped with an infrared flash enables it to capture pictures and videos at night by only allowing infrared light through to the camera sensor thereby allowing the camera to better “see” the infrared light that is being reflected back to it from the subject in front of the trail camera.
Inside the trail camera, there is a light filter assembly that is mounted with glue to the front of the camera module and is hard soldered to the circuit board. The assembly utilizes a solenoid, which is a small coil of wire, and a plunger used to control the position of the IR filter. When the solenoid receives a small electrical current from the camera’s circuit board it moves the plunger, which allows the IR filter to be moved into or out of position in front of the camera sensor, to switch between an IR light blocking filter that is used during the day and an IR pass filter that is required for use in low light conditions when the infrared flash is required.
If the IR filter isn’t in the correct position or becomes damaged the camera’s sensor will not be able to detect the infrared light and therefore won’t be able to successfully capture an image in low light settings resulting in black pictures.
What Can You Do If You Think Your Trail Camera Has A Problem With Its IR Filter?
If you have determined that the camera is using a good set of batteries and that the flash is indeed working it is probably time to reach out to the manufacturer especially if your trail camera is still under warranty. Tearing the camera apart and trying to address this issue by yourself isn’t something that the vast majority of people will be able to successfully do.
However, If your trail camera is out of warranty and isn’t worth that much anymore, but you would like to keep using it there are a couple of options.
The first option is to just use the camera during daytime hours, which might be a realistic option – especially if you use the camera for hunting purposes. Yes, it would be good to see every animal that passes by the camera regardless of the time of day, but hey aren’t you hunting during the daylight hours anyway, and isn’t information about what passes through during those daylight hours most important after all. Using the camera like this is ideal if the camera has an hours-of-operation timer on it so you can program it to be off during the night, which will not only prevent you from having to look at the black pictures the camera would take during that time, but it would also help conserve the batteries and save storage space on the memory card.
If you really want the camera to be able to take pictures and videos at night again there is another thing you could try, but try but I don’t know how successful it might be for you and you will run the risk of breaking your camera.
I know that some people have reported that hitting the camera with their hand or smacking on the side of a tree was successful at physically dislodging the IR filter and allowing it to go back into place. That said, if you try this you are running the risk of breaking the camera. So if you are desperate and/or don’t care if the camera ends up broken and unusable you can try this tactic and see if it works, but it certainly wouldn’t be my first option.
Final Thoughts
Hopefully, this has helped you to troubleshoot and figure out the cause of why your trail camera takes black pictures at night. Remember that most of the time this problem is caused by low voltage and potentially using the wrong batteries. Once you know the camera is getting the voltage it needs you can turn your attention to the flash itself or the IR filter, for cameras with infrared flash. If you have made your way through all these suggestions and still can’t come up with a solution don’t forget to reach out to the manufacturer especially if your trail cam is still under warranty.
Last update on 2026-06-06 at 05:05 / Affiliate links / Images from Amazon Product Advertising API
