
PIR sensors, also known as motion sensors, are used in trail cameras to detect movement in front of the camera. Every trail camera will have one or more PIR sensors. These sensors are integral to the design of every trail camera and will directly impact each camera’s performance.
In addition to the PIR sensors themselves, many trail cameras will also have adjustable settings for the sensor(s). This allows you to get optimal performance from the camera regardless of the environment you have the camera monitoring.
In this article, we will explain what a PIR sensor is and how they work. We will also explain what to look for from a PIR sensor when buying a trail camera as well as talk about the adjustable settings you might find for a trail camera’s motion sensor(s). Finally, we will talk about some tips to get the most out of your camera’s PIR sensors.
Table of Contents
What Does PIR Stand For?
PIR stands for Passive Infrared. This is because PIR motion sensors that are used in trail cameras and other devices detect infrared radiation.
How Do PIR Sensors Work to Detect Motion?
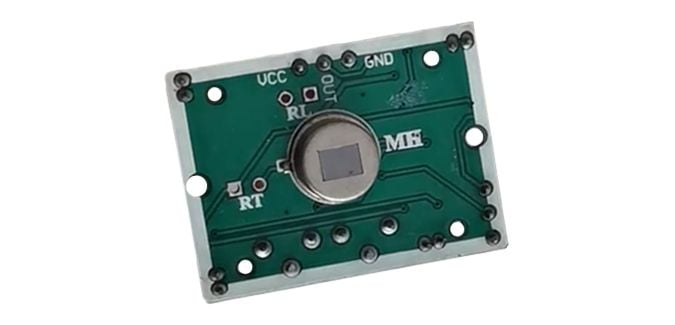
PIR sensors are used in a variety of applications. But how do they work? PIR motion sensors detect infrared radiation, or heat energy, which is given off by all objects with temperatures above absolute zero. More specifically, PIR sensors work by detecting rapid changes in the amount of infrared radiation that they receive.
Each PIR sensor will usually contain 2 or 4 elements that contain pyroelectric materials. These pyroelectric materials will produce voltage when exposed to temperature changes. So when an object enters the PIR sensor’s field of view it will be detected by one element first, which will create a difference between the elements. This temperature difference equates to sensing motion in front of the sensor.
When an object with a temperature that is different from its surroundings is detected moving through the detection area, the sensor produces an electrical signal that tells the device it is a part of to do a specific task. In the case of a trail camera, this signal tells the camera to begin taking pictures or videos.
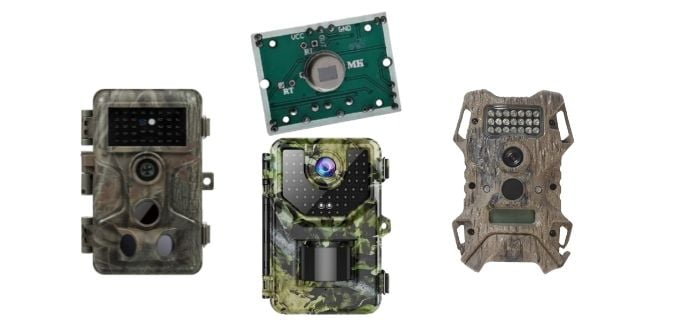
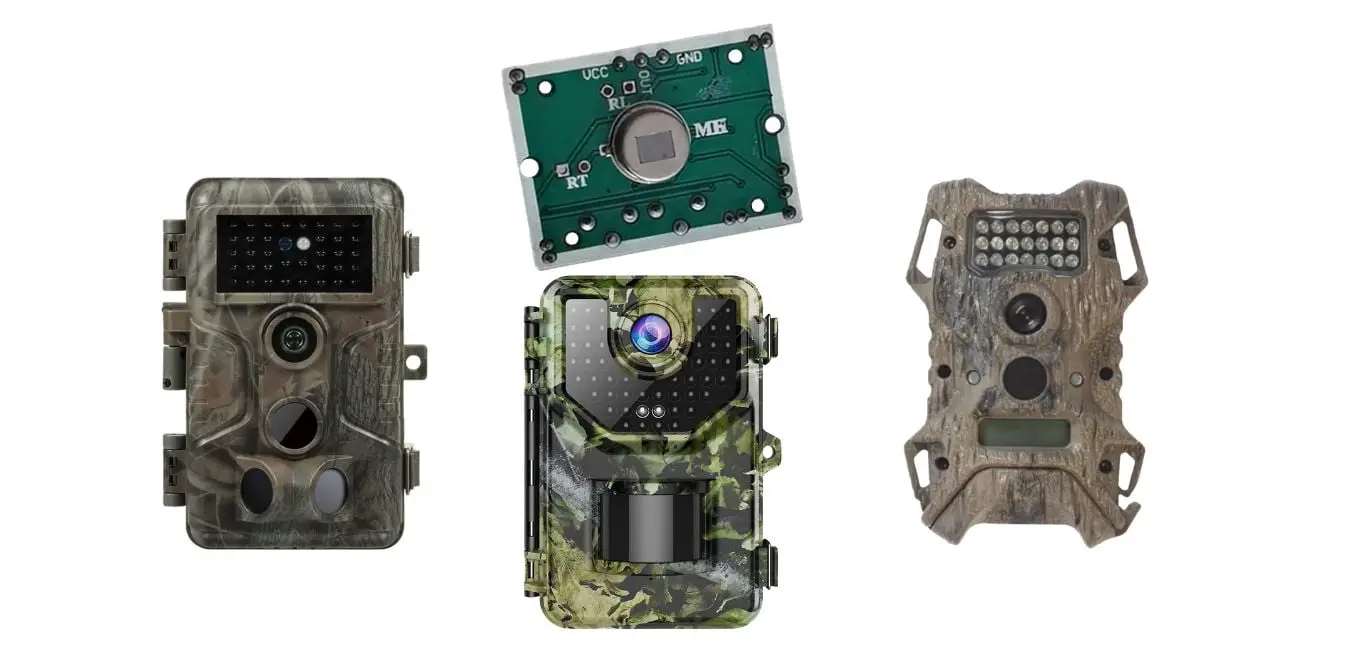
Depending on the device they are being used in, PIR sensors can be either rear or forward facing. Rear-facing sensors are paired with a mirror that is divided into sections. Forward-facing sensors, like those used in trail cameras, are paired with a plastic Fresnel lens that sits in front of the sensor to both, increase the sensor’s detection range and break the detection area into multiple smaller zones. Regardless of whether the sensor is rear-facing with a segmented mirror or forward-facing with a Fresnel lens, both systems serve to shape the sensing area and break it into multiple smaller zones to help the PIR be more sensitive and accurate.
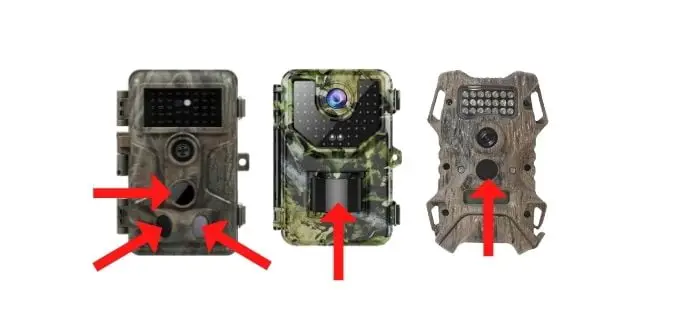
As seen below, regardless of the number of PIR sensors a trail camera has each sensor always a Fresnel lens in front of it.
What Devices Use PIR Sensors?
Many devices that need to respond to activity that is nearby will use PIR sensors to detect motion. In addition to trail cameras, security alarms, self-flushing toilets and urinals, automatic lighting, and motion-activated holiday decorations all use PIR sensors.
What Are the Benefits of Using PIR Sensors in a Trail Camera?
PIR sensors are beneficial to use in trail cameras for several reasons. First, they save battery power as the camera only activates when there is a subject in front of it. Second, since they make sure that the camera only captures pictures and videos when there is activity in the sensor’s detection area, they save storage space on the camera’s memory card. Third, they save money on data plans for cellular trail cameras by only transmitting images and videos that have a subject. This means that you won’t be wasting your data plan on images of an empty forest. In short, without PIR sensors trail cameras would be more expensive to operate and terribly inefficient.
Are All Trail Camera PIR Sensors the Same?
No, all trail camera PIR sensors are not the same. While it is true that the lens you put in front of the PIR sensor will affect its performance, PIR sensors come with a variety of different specs, detection ranges, and detection angles. The type of sensor manufacturers choose to put into specific trail cameras will vary depending on what their goals for each model were during development and the price point they were aiming for.
What Are the Different Adjustable Settings for PIR Sensors on Trail Cameras?
Trail cameras are an invaluable asset for hunters and property owners alike, providing them with the critical information they need. The versatility of trail cameras is a key selling point, as they can be used in a variety of locations or settings. Many trail cameras add to their versatility with adjustable settings.
Sensitivity Setting
While not all trail cameras have adjustable settings for their PIR sensors, some do offer the option to adjust the sensitivity level. This can really help you customize the camera for its surroundings.
Side PIR Sensors
For cameras with 3 sensors, the side sensors typically have the option to be turned on or off. In most situations, you will probably want to leave all 3 sensors on, but if you only want the camera to monitor a more narrow area or if the camera is placed in a setting where you are getting a lot of false triggers from the sides of the camera’s detection area you will be happy to be able to turn the side PIR sensors off.
PIR Delay Setting
Being able to control how frequently the camera can be triggered after taking pictures and videos allows you to get optimal performance in a variety of environments.
What Are Some Common Mistakes to Avoid With Your Trail Camera’s PIR Sensors?
One of the biggest mistakes people make with trail cameras is not thinking about the PIR sensor(s) when deciding where to place the camera. If you don’t consider how the camera’s placement will affect the PIR sensor(s), it may experience numerous false triggers, or fail to take pictures and videos of activity altogether. So here are some things to watch out for.
Don’t Mount the Camera Too Close to the Ground.
One of the things to keep in mind when setting up a trail camera is to NOT mount it too close to the ground. If you do, tall grass or brush can cause false triggers when the wind is blowing. The best way to avoid this is to mount and aim your camera above the vegetation so the grass and brush won’t trigger it to capture images and videos on windy days.
Don’t Mount the Camera on Part of a Tree Where It Is Surrounded by Leaves or Small Branches.
One of the worst places to put a trail camera is in a spot where it is surrounded by leaves and branches. While this might sound like a good way to conceal the location of your trail camera, it is also a great way to fill the memory card up in a hurry. Just like tall grass and brush, the leaves and branches can cause a lot of false triggers when the wind is blowing.
Don’t Face the Camera Toward the Sun.
Another bad idea when setting up a trail camera is to face the camera toward the sun. This will cause a ton of false triggers, as the camera tracks the heat from the sun as it moves across the sky. Not only will this result in a lot of wasted battery life, but it will also make it very difficult to spot actual game animals on the camera’s memory card as you have to sort through hundreds of pictures or videos with nothing in them before you find one with a game animal in it. For best results, set up your trail camera with the sun at its back.
Don’t Point the Camera Directly at a Body of Water.
Similar to how setting your trail camera up facing the sun can cause you a lot of problems, setting your camera up so that it is pointing the camera directly at a body of water can be troublesome too. Having your trail camera face a body of water can lead to false triggers from waves or reflections from the sun. Ideally, you should try to monitor are areas that are by a body of water by placing the camera in a location where it isn’t facing the water.
If you have no other option and need to have your trail camera face the water you can check out our article where we talk about what you can do to keep your trail camera from having false triggers where we have more information.
Remember to Wipe Any Dirt and Debris off the Front of the Fresnel Lens That Sits in Front of the PIR Sensor.
Even though trail cameras are designed to work outside, in all types of weather, the PIR (Passive Infrared) sensor that detects motion can become obscured, or blocked, by dirt and debris. While not common if this does happen to your trail camera it will prevent the PIR to detect motion correctly and potentially render it unable to trigger the camera to take pictures and videos.
So when you first place your camera in the woods or go to check your camera’s batteries or SD card, it is important to check the front of the camera and wipe off any dirt or debris that might be on the Fresnel lens in front of the PIR sensor. This will help ensure that your trail camera is working at its’ best so you don’t miss any important shots.
What Are Some Tips for Getting the Most Out of Your Trail Camera’s PIR Sensors?
Getting the most out of your trail camera’s PIR sensors means getting the maximum detection range with the minimum amount of false triggers. To do this, there are several things you can do:
- You should make sure that the camera is facing north if possible, to avoid false triggers caused by the sun.
- If the camera has adjustable PIR sensitivity, you should turn the sensitivity up to high to maximize the detection range and area.
- You should also avoid placing the camera in a location where the expected activity in front of the camera will be at the end of the detection range. Animals or people at the limits of the detection range might not get detected if environmental conditions change or if battery power gets too low.
- To avoid problems caused by low battery voltage, you can use lithium batteries as they provide consistent voltage throughout their life cycle.
- As we said earlier, avoid placing or aiming the camera too close to the height of tall grass or brush.
- Check your camera regularly at first to make sure it isn’t picking up a lot of false triggers. If the camera is experiencing false triggers, you can try elevating the camera or trimming or pruning the nearby vegetation that might be causing the camera to trigger.
- If the camera is experiencing false triggers, you can try elevating the camera or trimming or pruning the nearby vegetation that might be causing the camera to trigger.
- For cameras with adjustable sensitivity, you can always turn down the sensitivity or turn off the side PIR sensors (for cameras with 3 sensors) if you struggle with false triggers and can’t get rid of them.
FAQs About Trail Camera PIR Sensors
What Is the PIR Delay (Detection Delay) Setting on Trail Cameras?
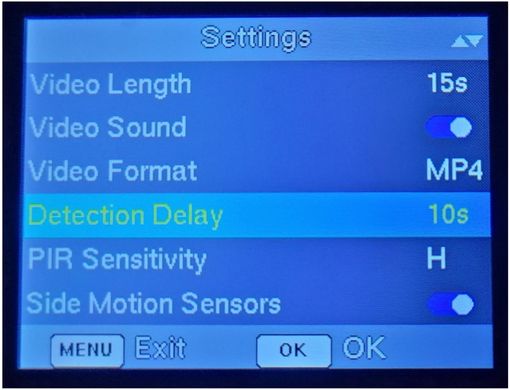
Most modern-day trail cameras have a Detection Delay setting that determines how long the camera will wait before taking another picture after it is triggered. It essentially allows you to disable the camera’s PIR sensors for a period of time so the camera doesn’t take pictures or videos of the same thing over and over again. Using this feature can be really helpful when you have the camera posted in an area where deer or other game animals come and hang out for long periods. Taking multiple pictures or videos of the same animal by a food plot or feeder usually doesn’t get you any more meaningful information and will just drain the camera’s batteries and use up all the space on its memory card.
The delay is adjustable and can be set to a specific time, such as 10 seconds, so you can choose the perfect PIR delay setting for your needs. For those situations where it is important to get as many pictures or video clips as you can, you can turn the feature off or set the delay to 0.
What is PIR Interval?
Some trail manufacturers or users will refer to PIR interval, which might cause some people confusion if they haven’t heard that terminology before. PIR interval is another term used to refer to the PIR delay setting on trail cameras. As we just discussed the PIR delay setting determines the amount of time the camera will wait between PIR detections before triggering the camera to take a photo or video. A shorter PIR interval time, or delay, time will result in the possibility of more frequent photos or videos, when there is activity in front of the camera while a longer PIR delay time will result in fewer photos or videos.
Some people may also use the word “interval” when talking about how frequently the camera takes pictures or records video when the camera is using the time-lapse feature.
How Does Time-Lapse Mode Affect the PIR Sensors on Trail Cameras?
There was a time when finding a trail camera with time-lapse mode was rare. Now having the option to operate trail cameras using time-lapse mode is the norm. Using the time-lapse feature can be helpful if you want to monitor slow-moving natural events, like a flower blooming, or if you want to monitor an area that is beyond the camera’s detection range. And while it isn’t my first choice for dealing with false triggers, using the time-lapse mode can be a last resort for people who have their camera placed in an area where they just can’t seem to stop it from having false triggers.
With most cameras, the PIR sensors are disabled when the time-lapse mode is enabled. However, some trail cameras have a special time-lapse mode that leaves the PIR sensors enabled. This allows the camera to take pictures at set intervals that you select (e.g. every 10 minutes) and still be triggered by motion.
What Is a Good PIR Setting on a Trail Camera?
Different cameras will have different available settings with more expensive cameras usually offering more customizable options. The optimal PIR settings for a trail camera will depend on a variety of factors, including where the camera is being used and what you are trying to capture. However, here are some general guidelines to consider:
Sensitivity setting: If the sensitivity is too high, the camera experiences more false triggers. On the other hand, if the sensitivity is too low, the camera may miss animals passing through the detection area. It is recommended to start with a mid-range sensitivity setting and adjust it up or down based on the performance of the camera in the field.
PIR detection delay setting: Determining how much time passes between when the camera takes a picture or video and when it can be triggered again is important. A shorter delay time can result in more pictures and videos but may also drain the battery faster. A longer delay time will result in fewer pictures or videos but can extend the battery life of the camera. The optimal delay time will depend on the speed of the wildlife in the area and how often you want to capture their movements. For how I use my cameras I usually like a 10 to 15-second delay, but a 30-second to a 1-minute delay time is also common for some users.
Side PIR sensors: Some trail cameras have side PIR sensors that provide additional coverage on either side of the main detection zone. These sensors can be useful for capturing animals that move parallel to the camera, but they can also increase false triggers. Odds are you paid more for a camera with these extra sensors so I could recommend starting out with these sensors on. If you find that your camera is capturing too many false positives, you may want to disable the side PIR sensors or try turning down the sensitivity to a lower setting.
Do PIR Sensors Work Through Windows?
One common question people ask about trail cameras is whether they can work through windows. To answer this question, we did some experiments to determine whether trail cameras can work through glass.
After we tested multiple trail cameras in front of different windows, we found that there are multiple issues when trying to use trail cameras from behind a window, but perhaps the biggest issue relates to the PIR sensors. As we previously discussed, PIR sensors only detect infrared radiation, which is emitted by warm objects. Glass, however, is a poor conductor of heat, so the infrared radiation from the outside world is mostly blocked by the window. This means that the PIR sensor will not be able to detect most objects from behind a window. Plus, whatever infrared radiation the PIR might be able to detect would be distorted by the glass making the sensor less accurate. This problem is only made worse when trying to use trail cameras from behind energy-efficient windows with multiple panes of glass. While there could be a few exceptions to this rule, for the most part, trail cameras will not have much success or usefulness working through glass windows.
Do PIR Sensors Transmit Anything?
There is a misconception that PIR sensors transmit infrared energy or other things for that matter. PIR sensors are in fact only sensitive to infrared energy that is emitted from objects in their field of view. In other words, PIR sensors can detect the presence of infrared energy, but they cannot emit it. This is why PIR sensors are used in trail cameras, as they can detect the infrared energy emitted by animals, but they will not emit any infrared energy themselves and therefore will not scare the animals away or alert anyone to their presence.
Do PIR Sensors See or Take Pictures of What It Is Monitoring?
PIR sensors can detect the presence of animals or intruders by detecting the infrared radiation emitted by objects within their field of view. However, they cannot provide visual information about what they are detecting. They do not see or take pictures of what they are monitoring.
What Happens if the Fresnel Lens on My Trail Camera Breaks or Cracks?
If the Fresnel lens in front of the PIR sensor on your trail camera is broken or cracked it can negatively impact the PIR sensor”s performance, resulting in false positives or missed detections. In addition, a cracked or broken Fresnel lens can also be a point of water intrusion, causing the electronics inside the trail camera to become damaged. If you notice that the lens on your trail camera is damaged, it is important to replace it as soon as possible to avoid these issues.
Depending on how old the trail camera is you might be able the Fresnel lens replaced as a warranty repair. If your camera is out of warranty I know that many manufacturers like SPYPOINT and Browning sell replacement PIR lenses. So if your camera’s lens needs to be replaced, contact your camera’s manufacturer to inquire about replacement parts.
Warning: If your camera is still under warranty and you take it apart to replace the Fresnel lens yourself you may void the warranty, should any damage to electronic components occur during the repair. So please check with the manufacturer before attempting this repair if your camera is under warranty.
Do PIR Motion Sensors on Trail Cameras Make Noise?
Many trail camera users are concerned that the motion sensors on their cameras will make noise and scare away animals, or give away the camera’s location. While it is true that old models of PIR sensors did make noise when they triggered, newer designs like those found on trail cameras are completely silent.
Final Thoughts
As we’ve seen, PIR sensors are an essential part of any trail camera. So if you’re looking to buy a trail camera, or want to get the most out of the one you have, it’s important to understand how PIR sensors work. When purchasing a trail camera, be sure to consider the quality of the sensor as well as any adjustable settings that might be available. By taking these factors into account and following our tips, you can be sure to get the most out of your trail camera no matter the environment and capture those perfect shots.
